# graphapi® Project Wizard
The graphapi® Project Wizard guides you through setting up and publishing a dedicated low-code backend. Workspace members with owner, admin, or developer roles can start the wizard by clicking on the New project widget on the workspace dashboard.
# Step 1 - Initial setup
Specify the name of your graphapi and select a region that is close to your customers and users to achieve the lowest latency. API keys are the default authorization method.
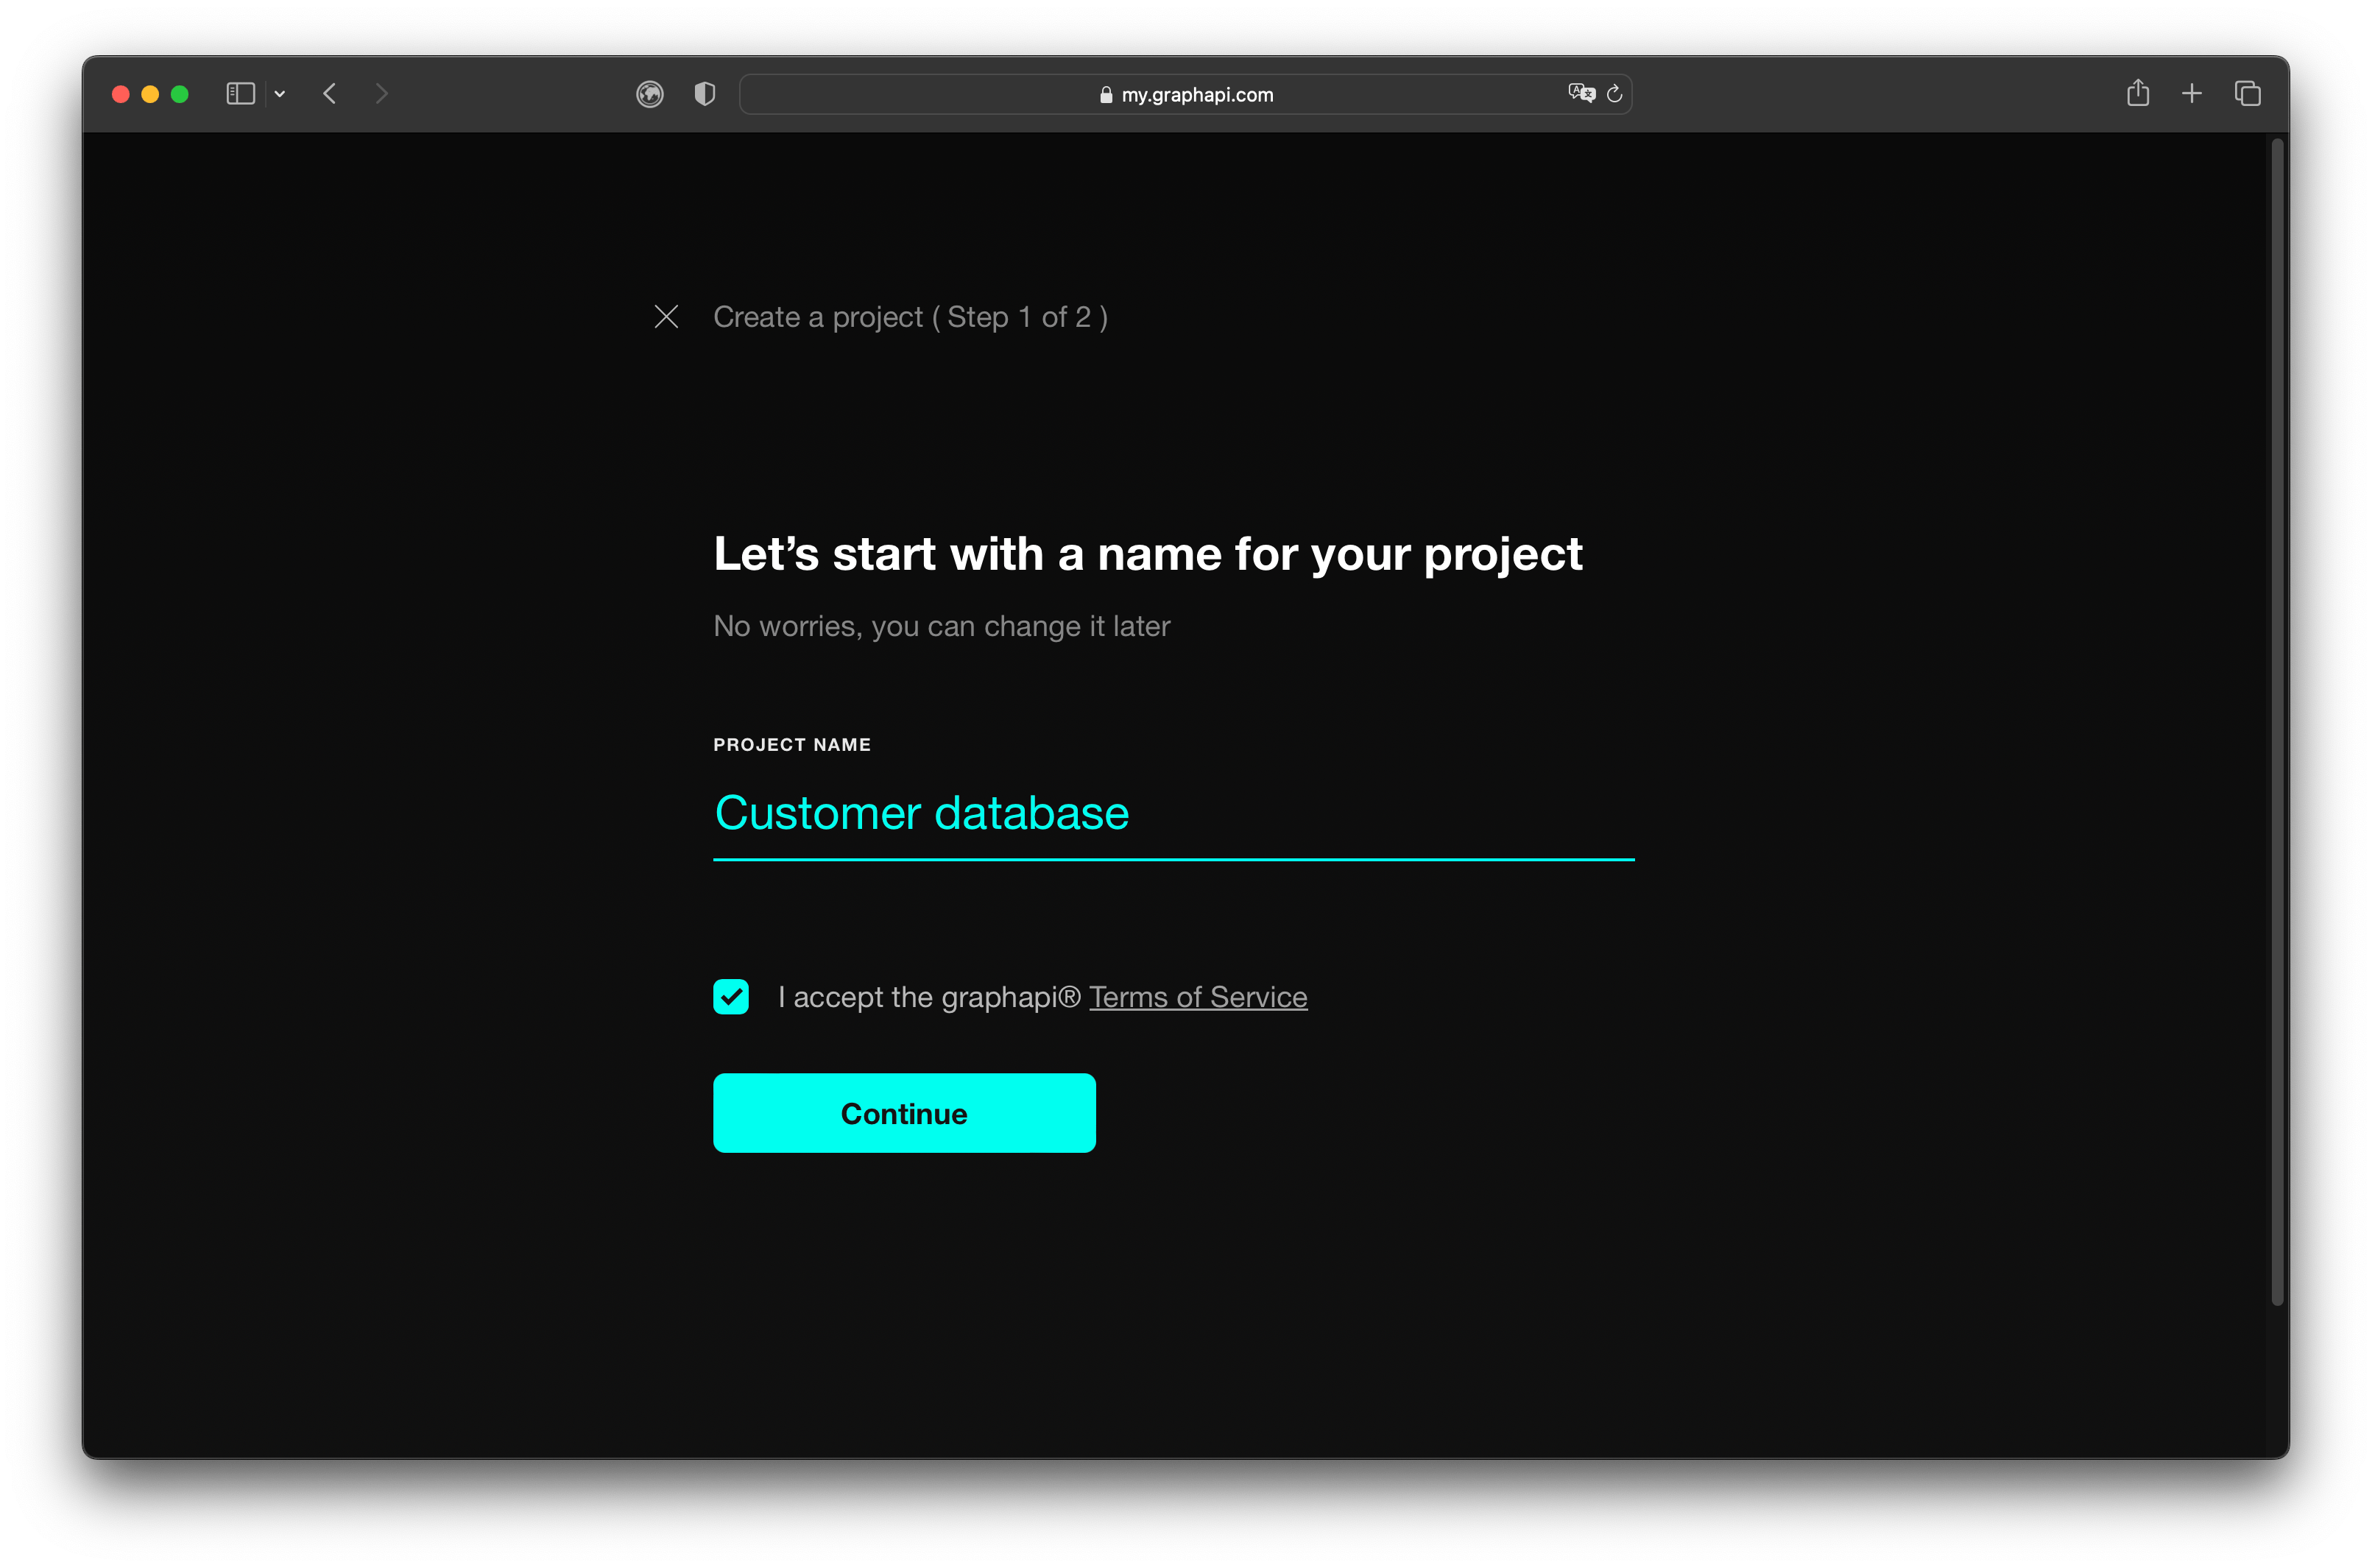
For secure user identity and access management, select from the following options:
- AWS Cognito:
- OpenID Connect: For customers using an OpenID provider (opens new window)
WARNING
Use API key authorization only for development purposes or where it is safe to expose data publicly.
# Step 2 - Data Model Setup
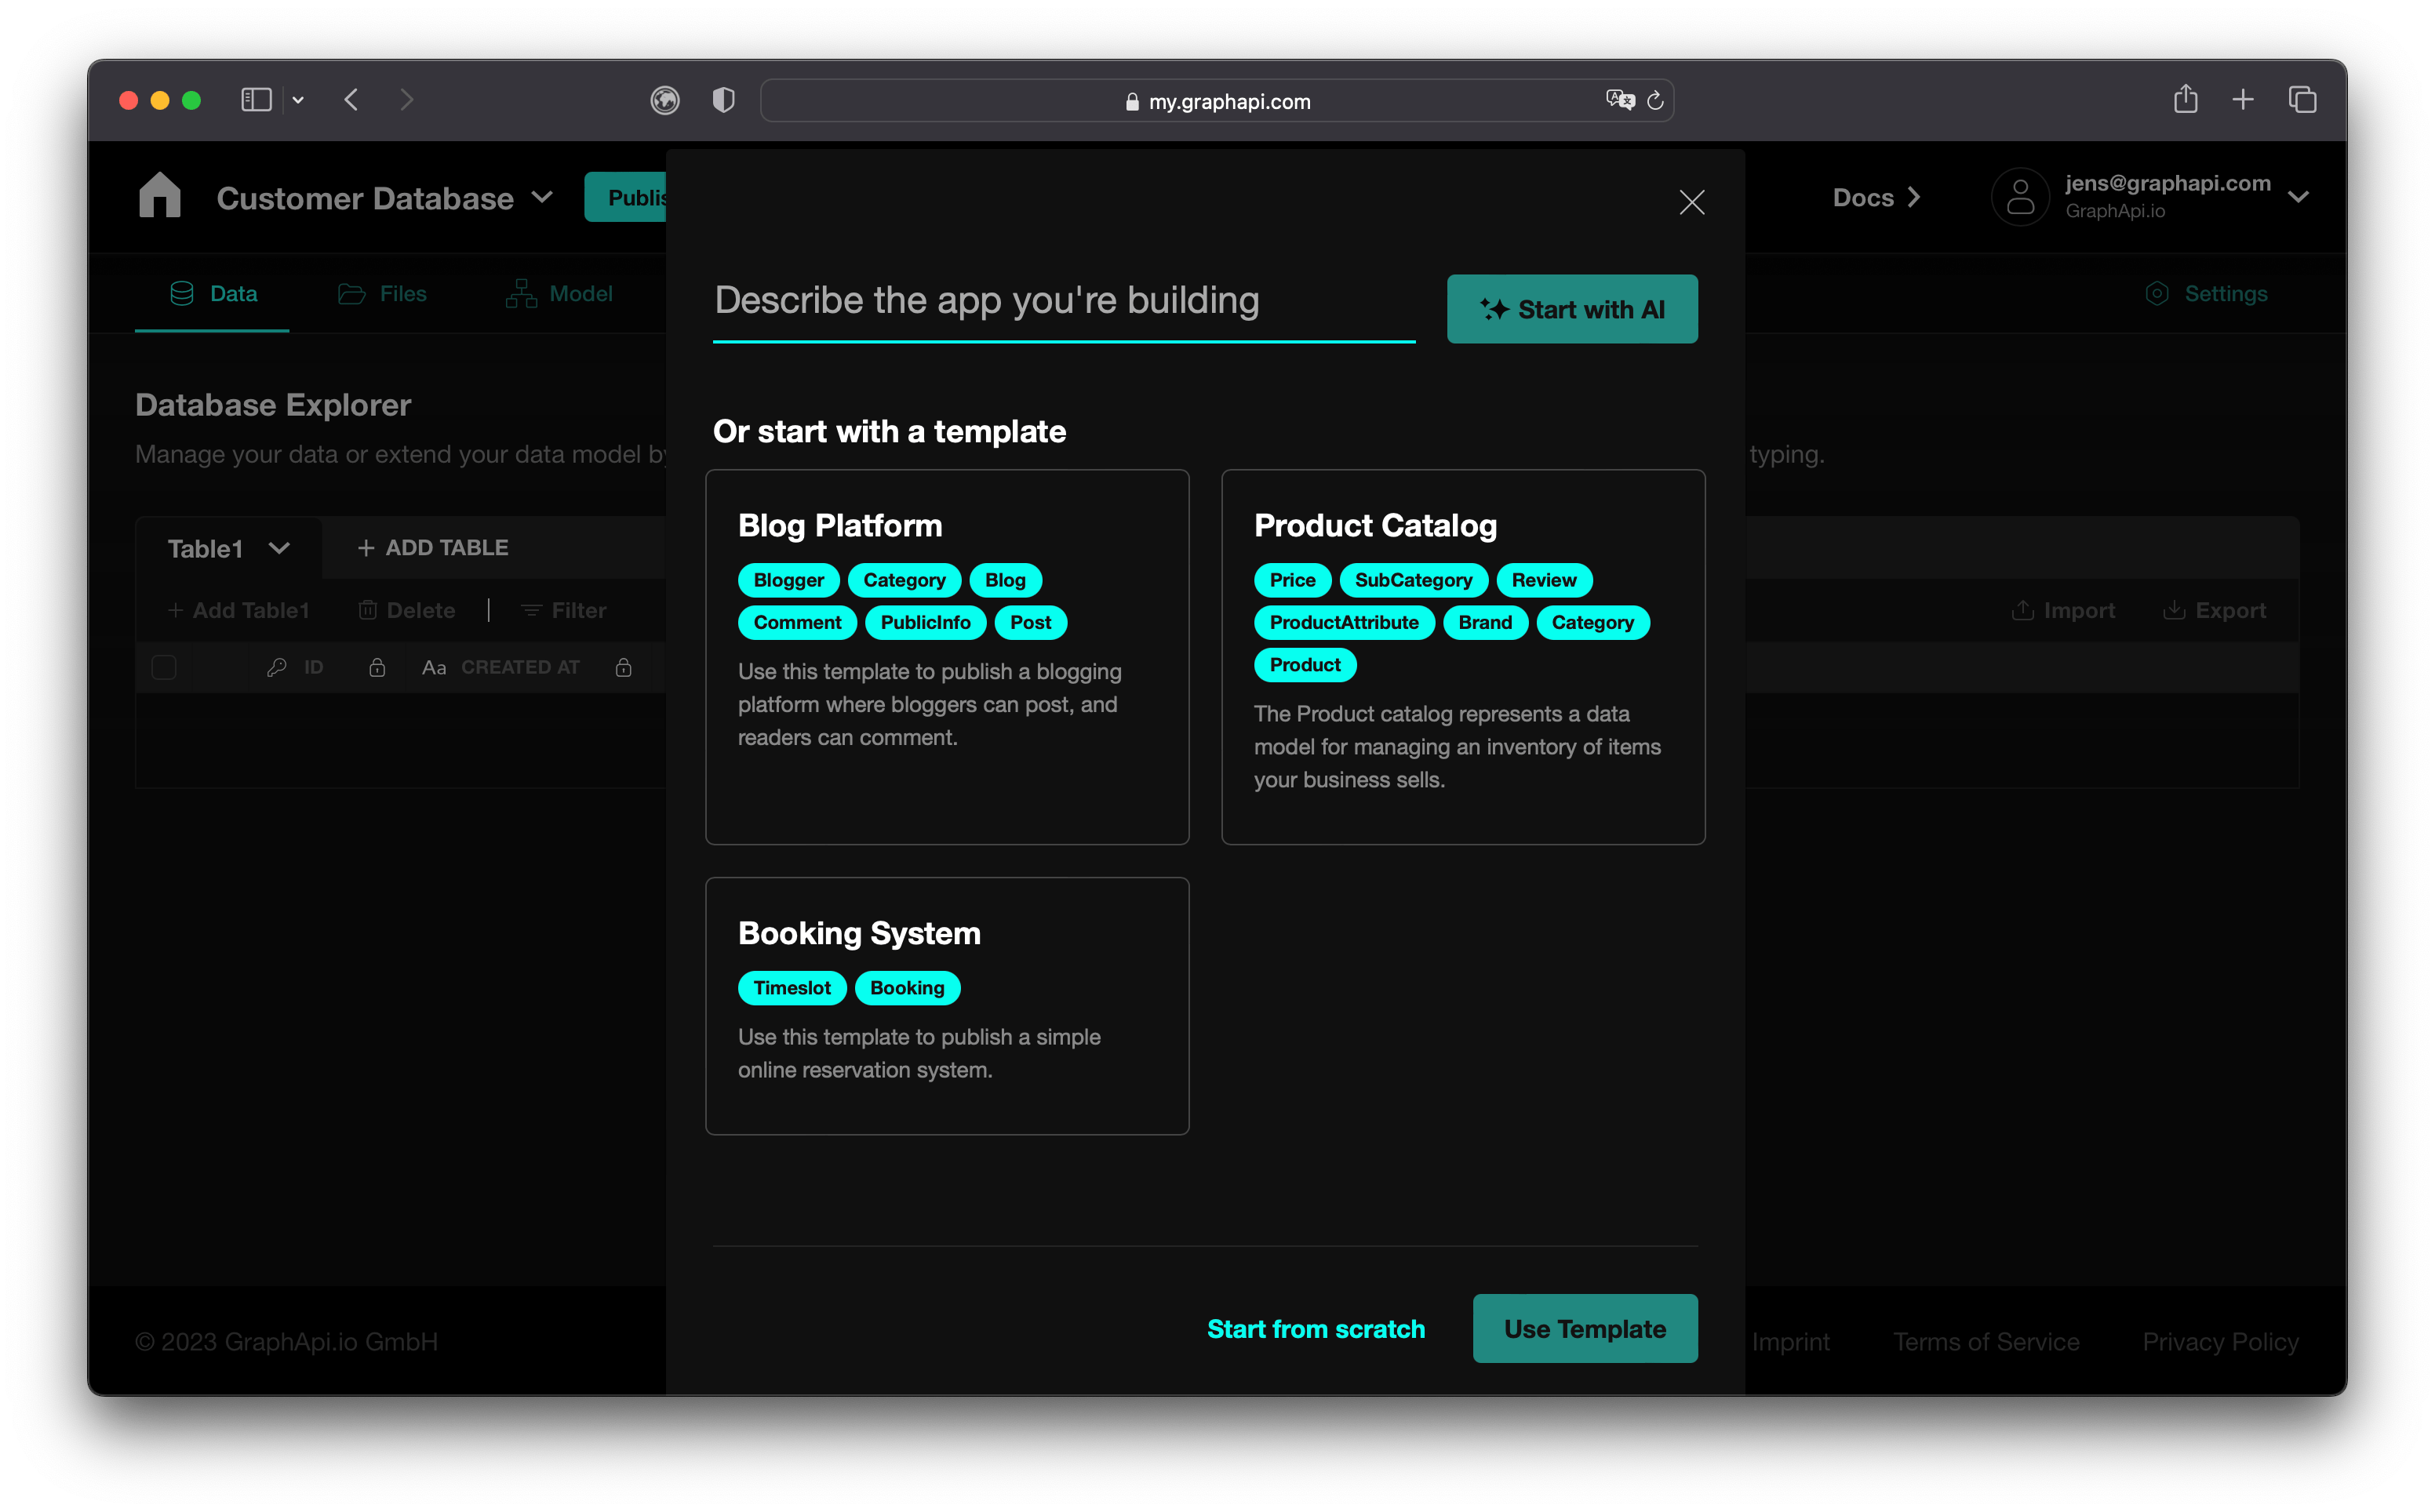
You can either start your data model from scratch or choose from our library of templates as shown in the screenshot below. Alternatively you can describe the app you're building to our Gen-AI assitant to get you started even faster.
Further reading: Data Model setup guide
# Step 3 - Publish your project
After you are happy with the first version of your data model, go ahead an publish your project. You'll find a publish button in the navigation bar.
# Step 4 - Select Users Table
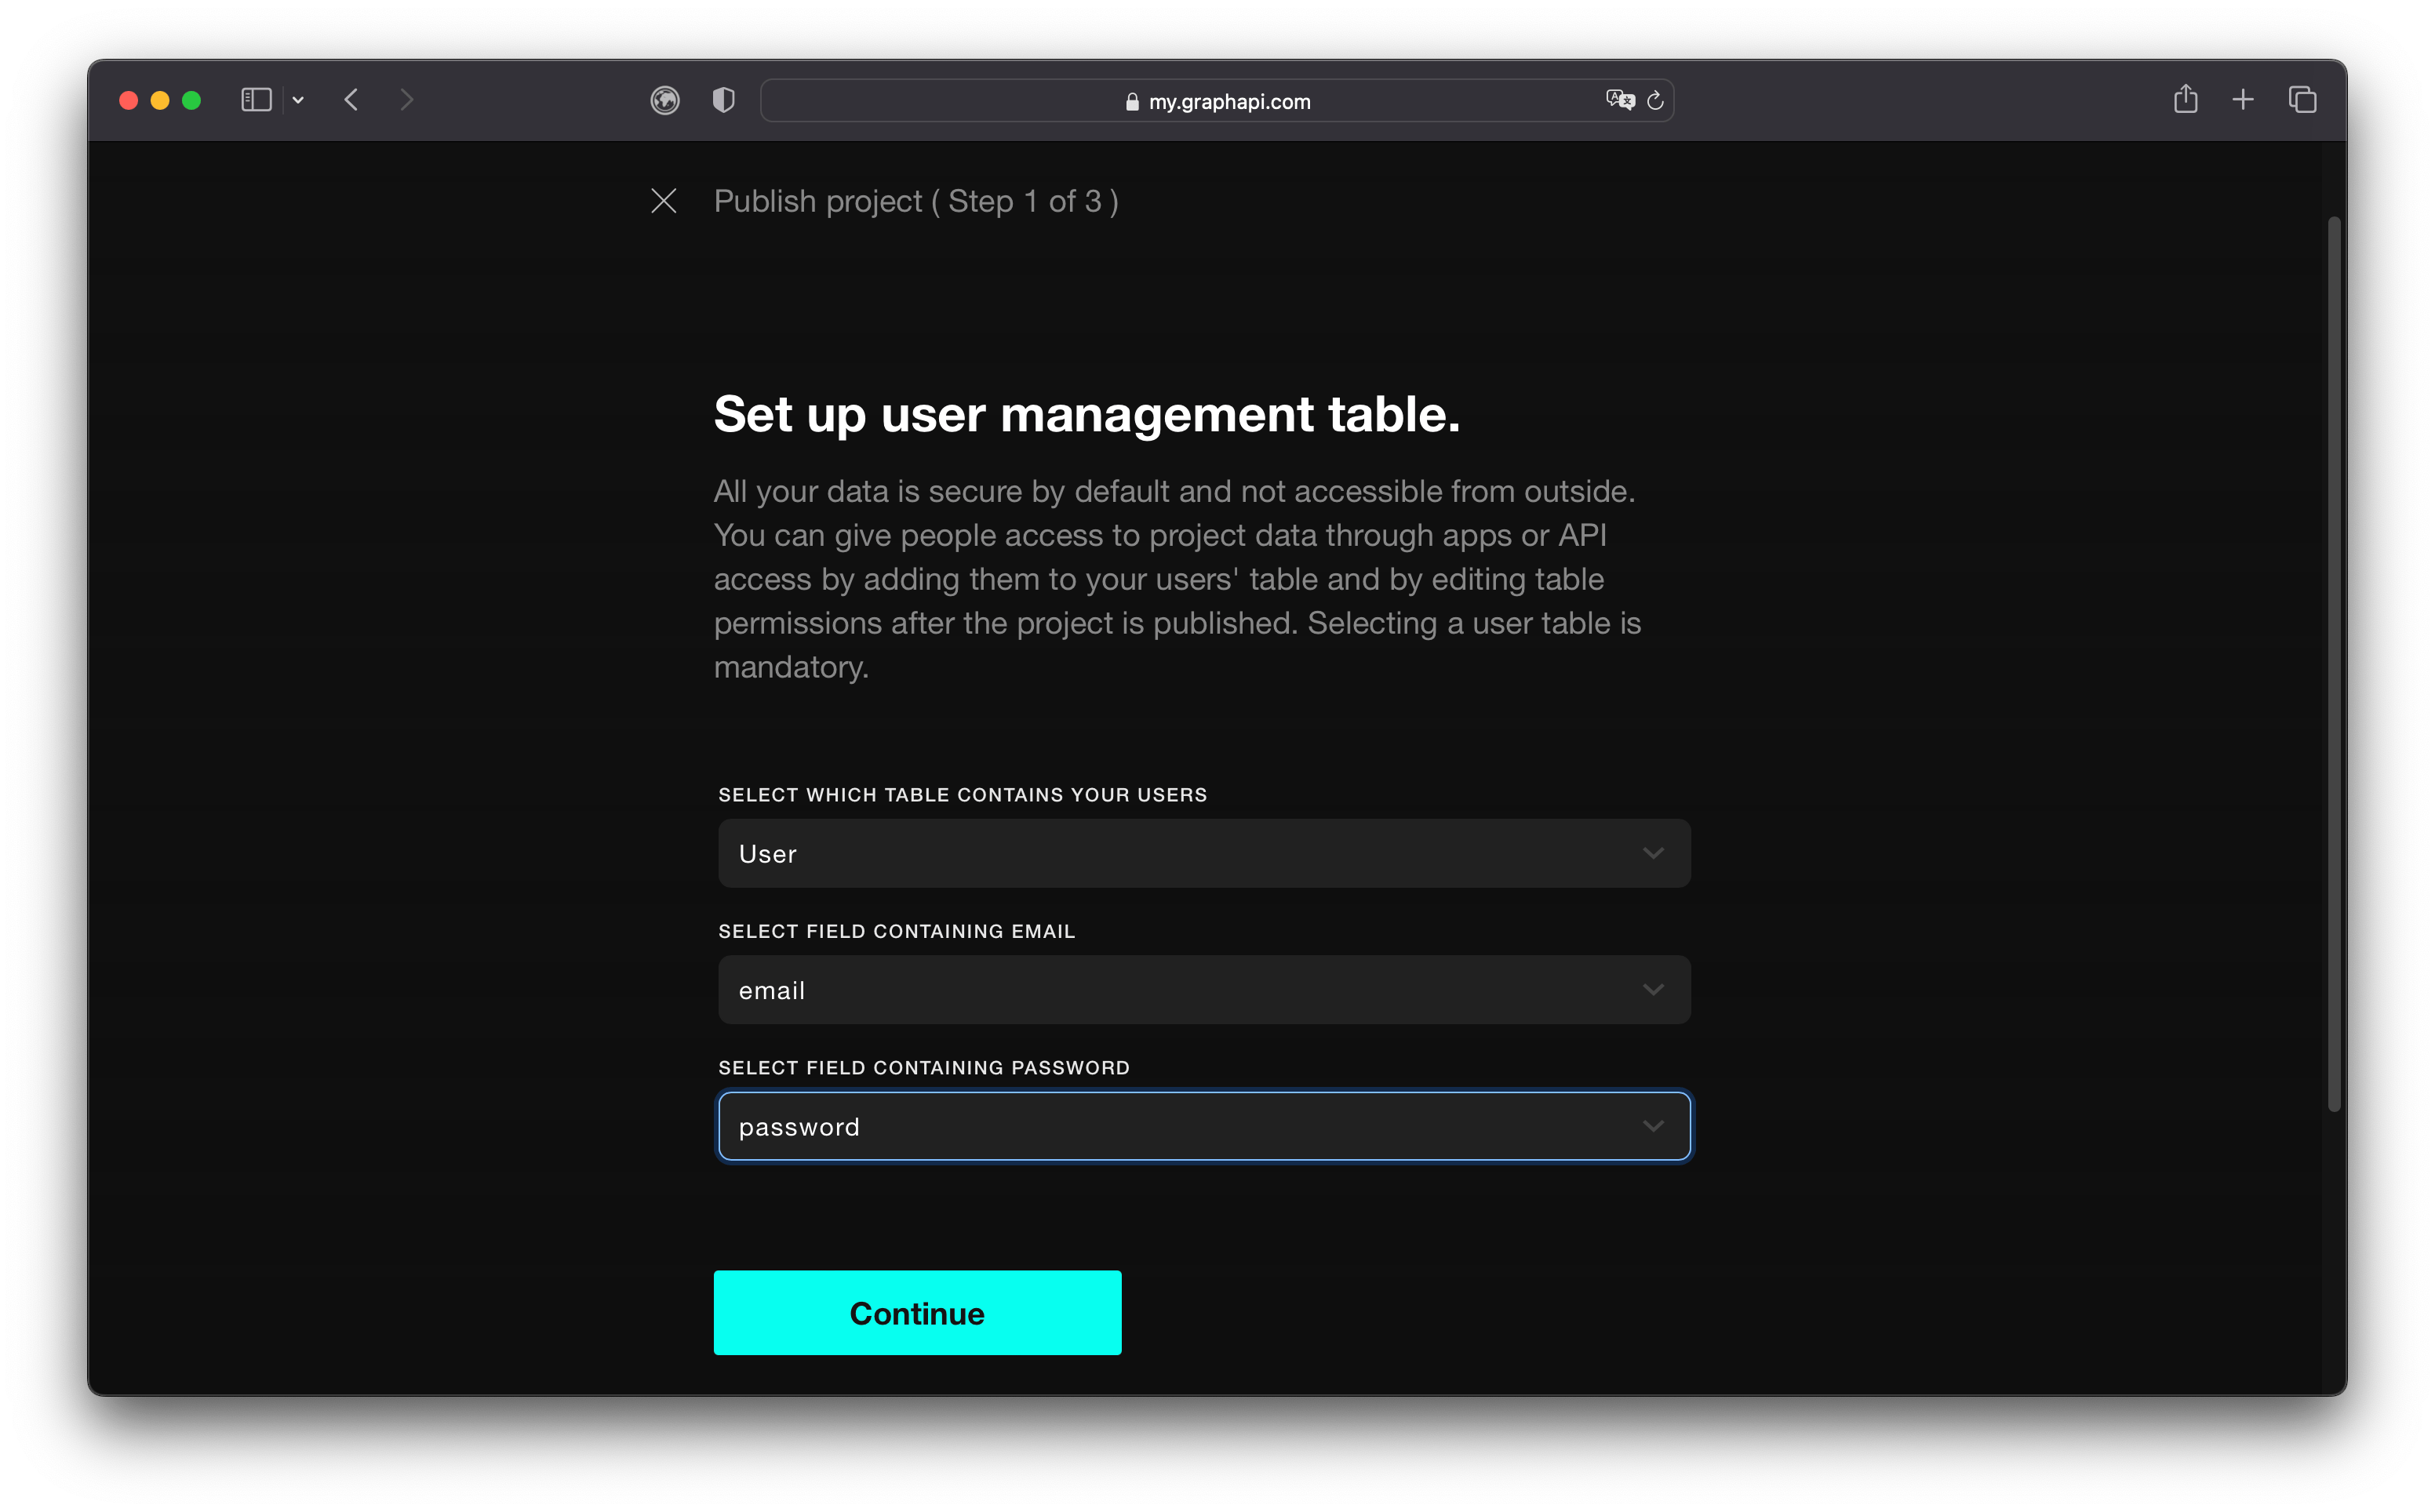
Every project has built-in email-based user authentication and API-key authentication whenever admins set a table to public. Any table of your project can serve as the user's table. The only precondition is that it has two fields for the user's email and password.
You must select the user table and its email and password fields when publishing your project. You can name the email and password fields according to your preference, but we recommend using the standard names, email, and password.
# Step 5 - Select Data Region
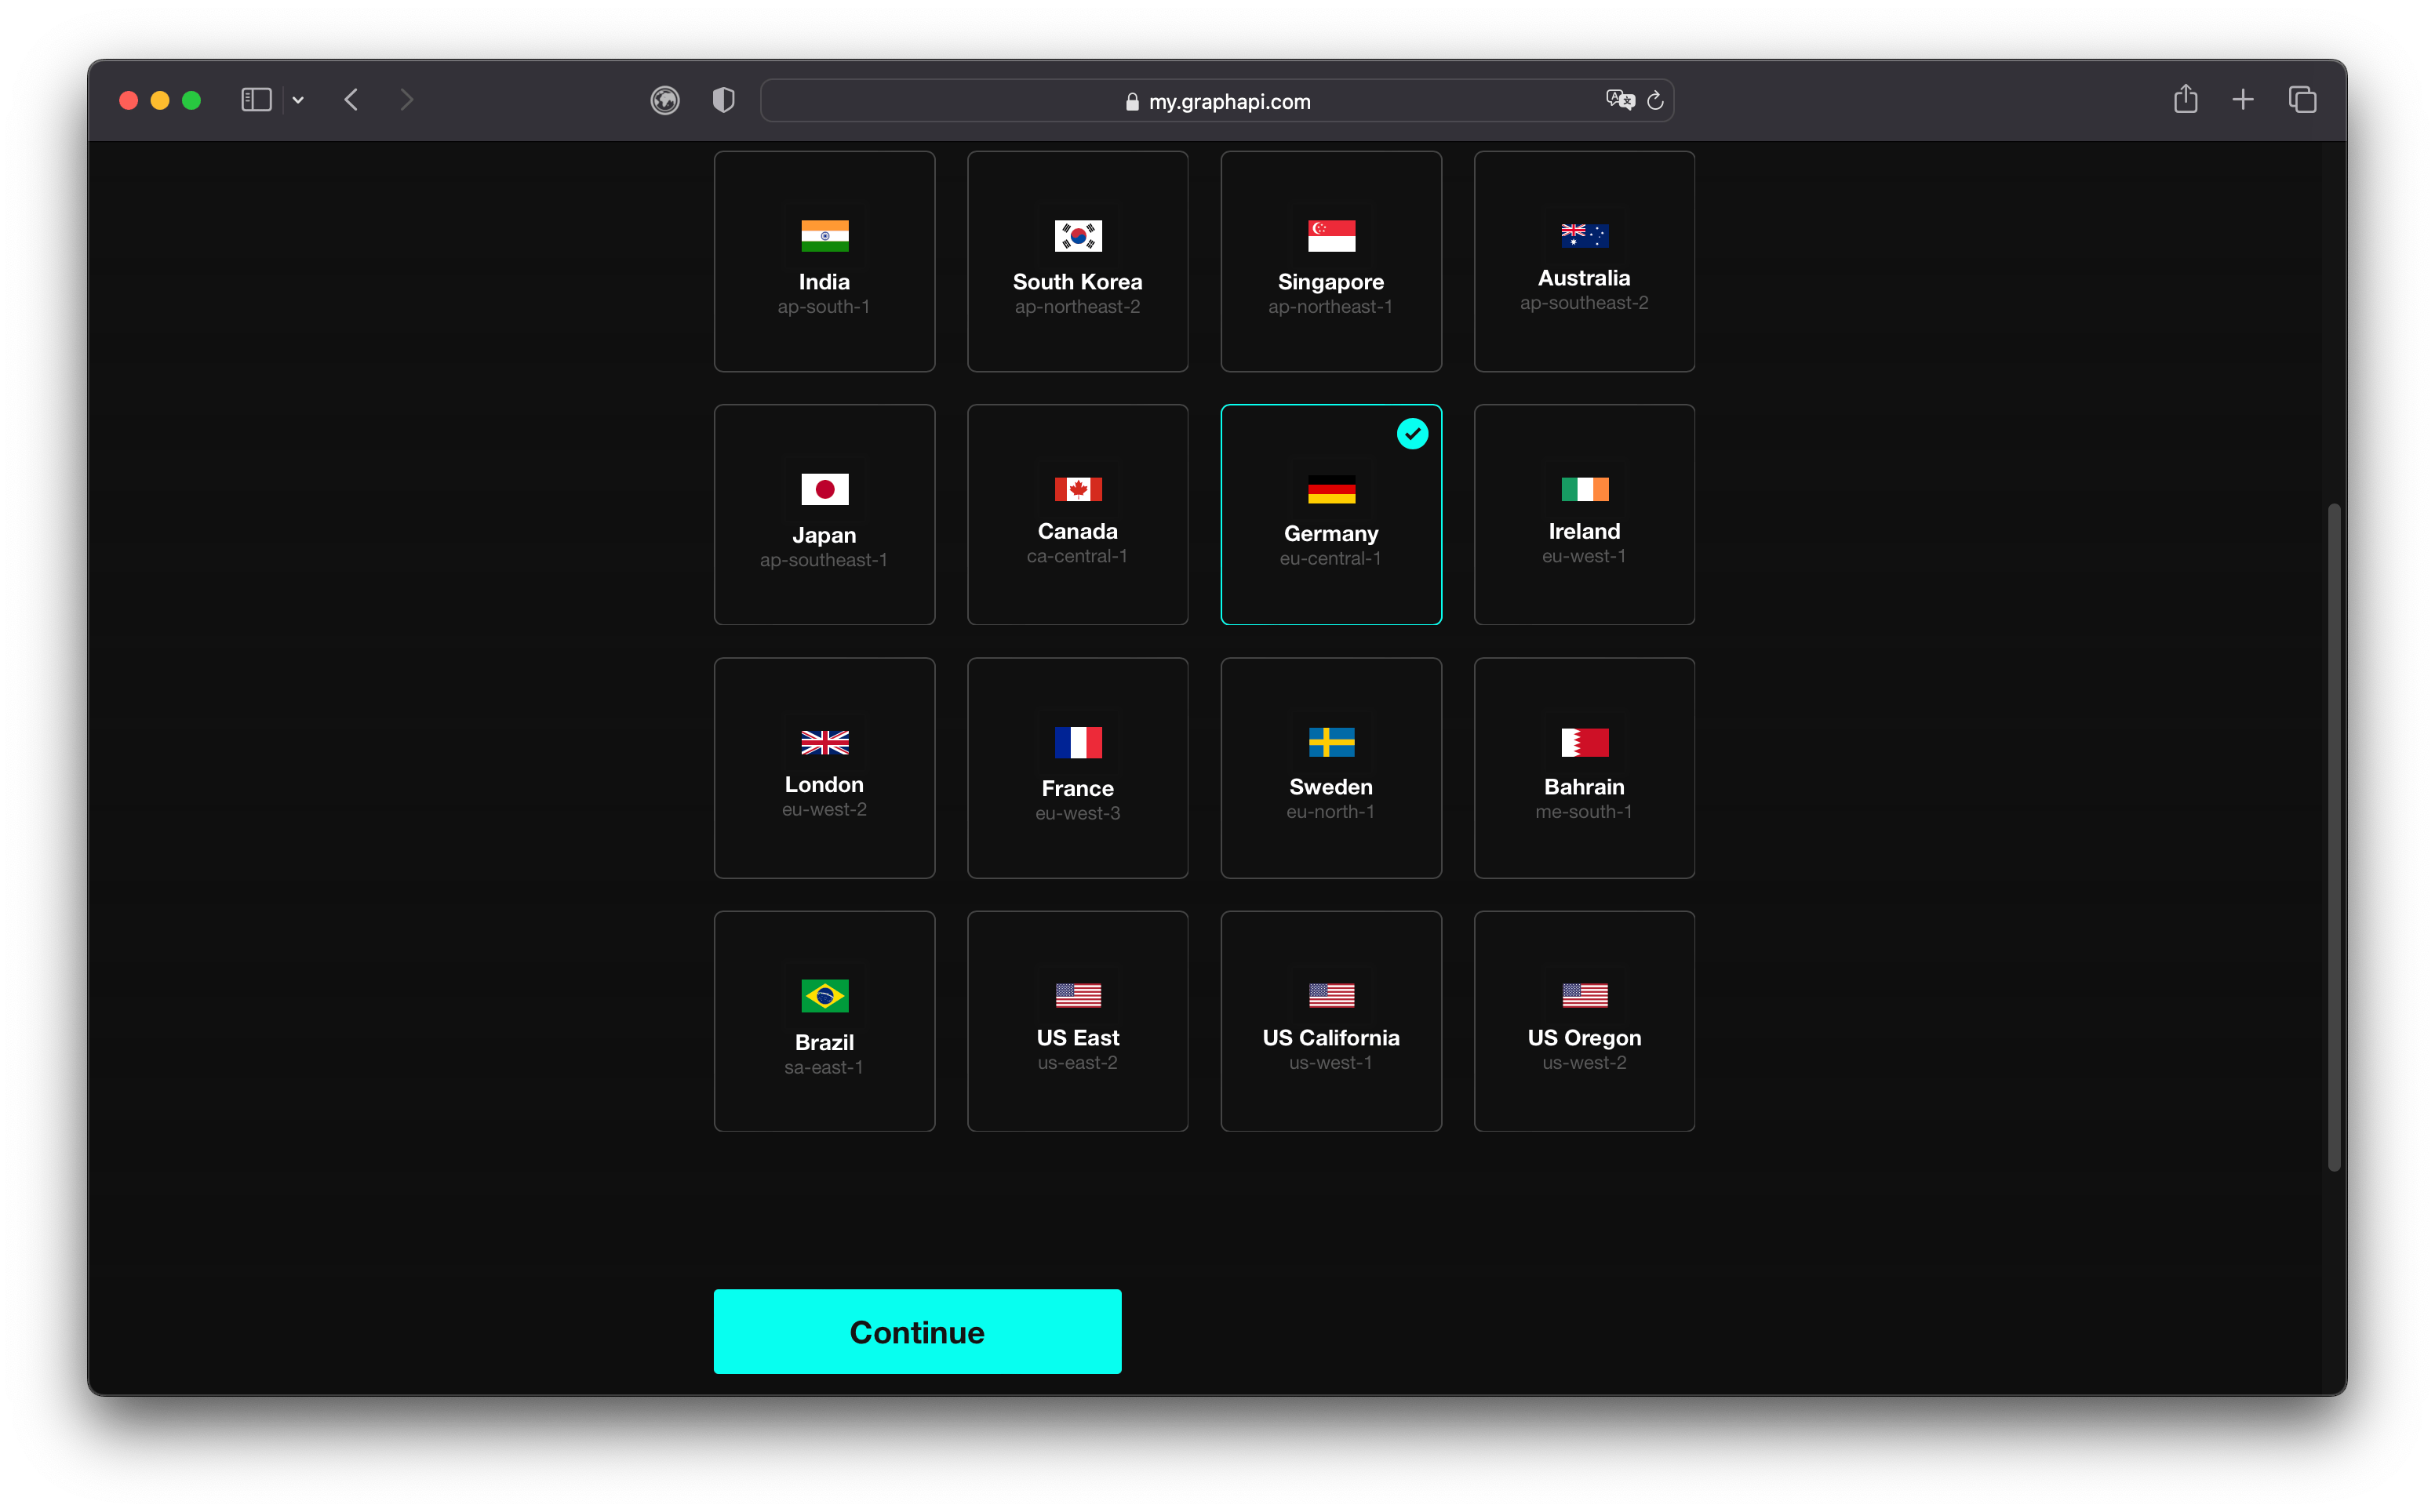
Each project will be published as a dedicated stack to one of 16 available data centers. Choose from regions across Europe, the Americas, Asia, and the Middle East.
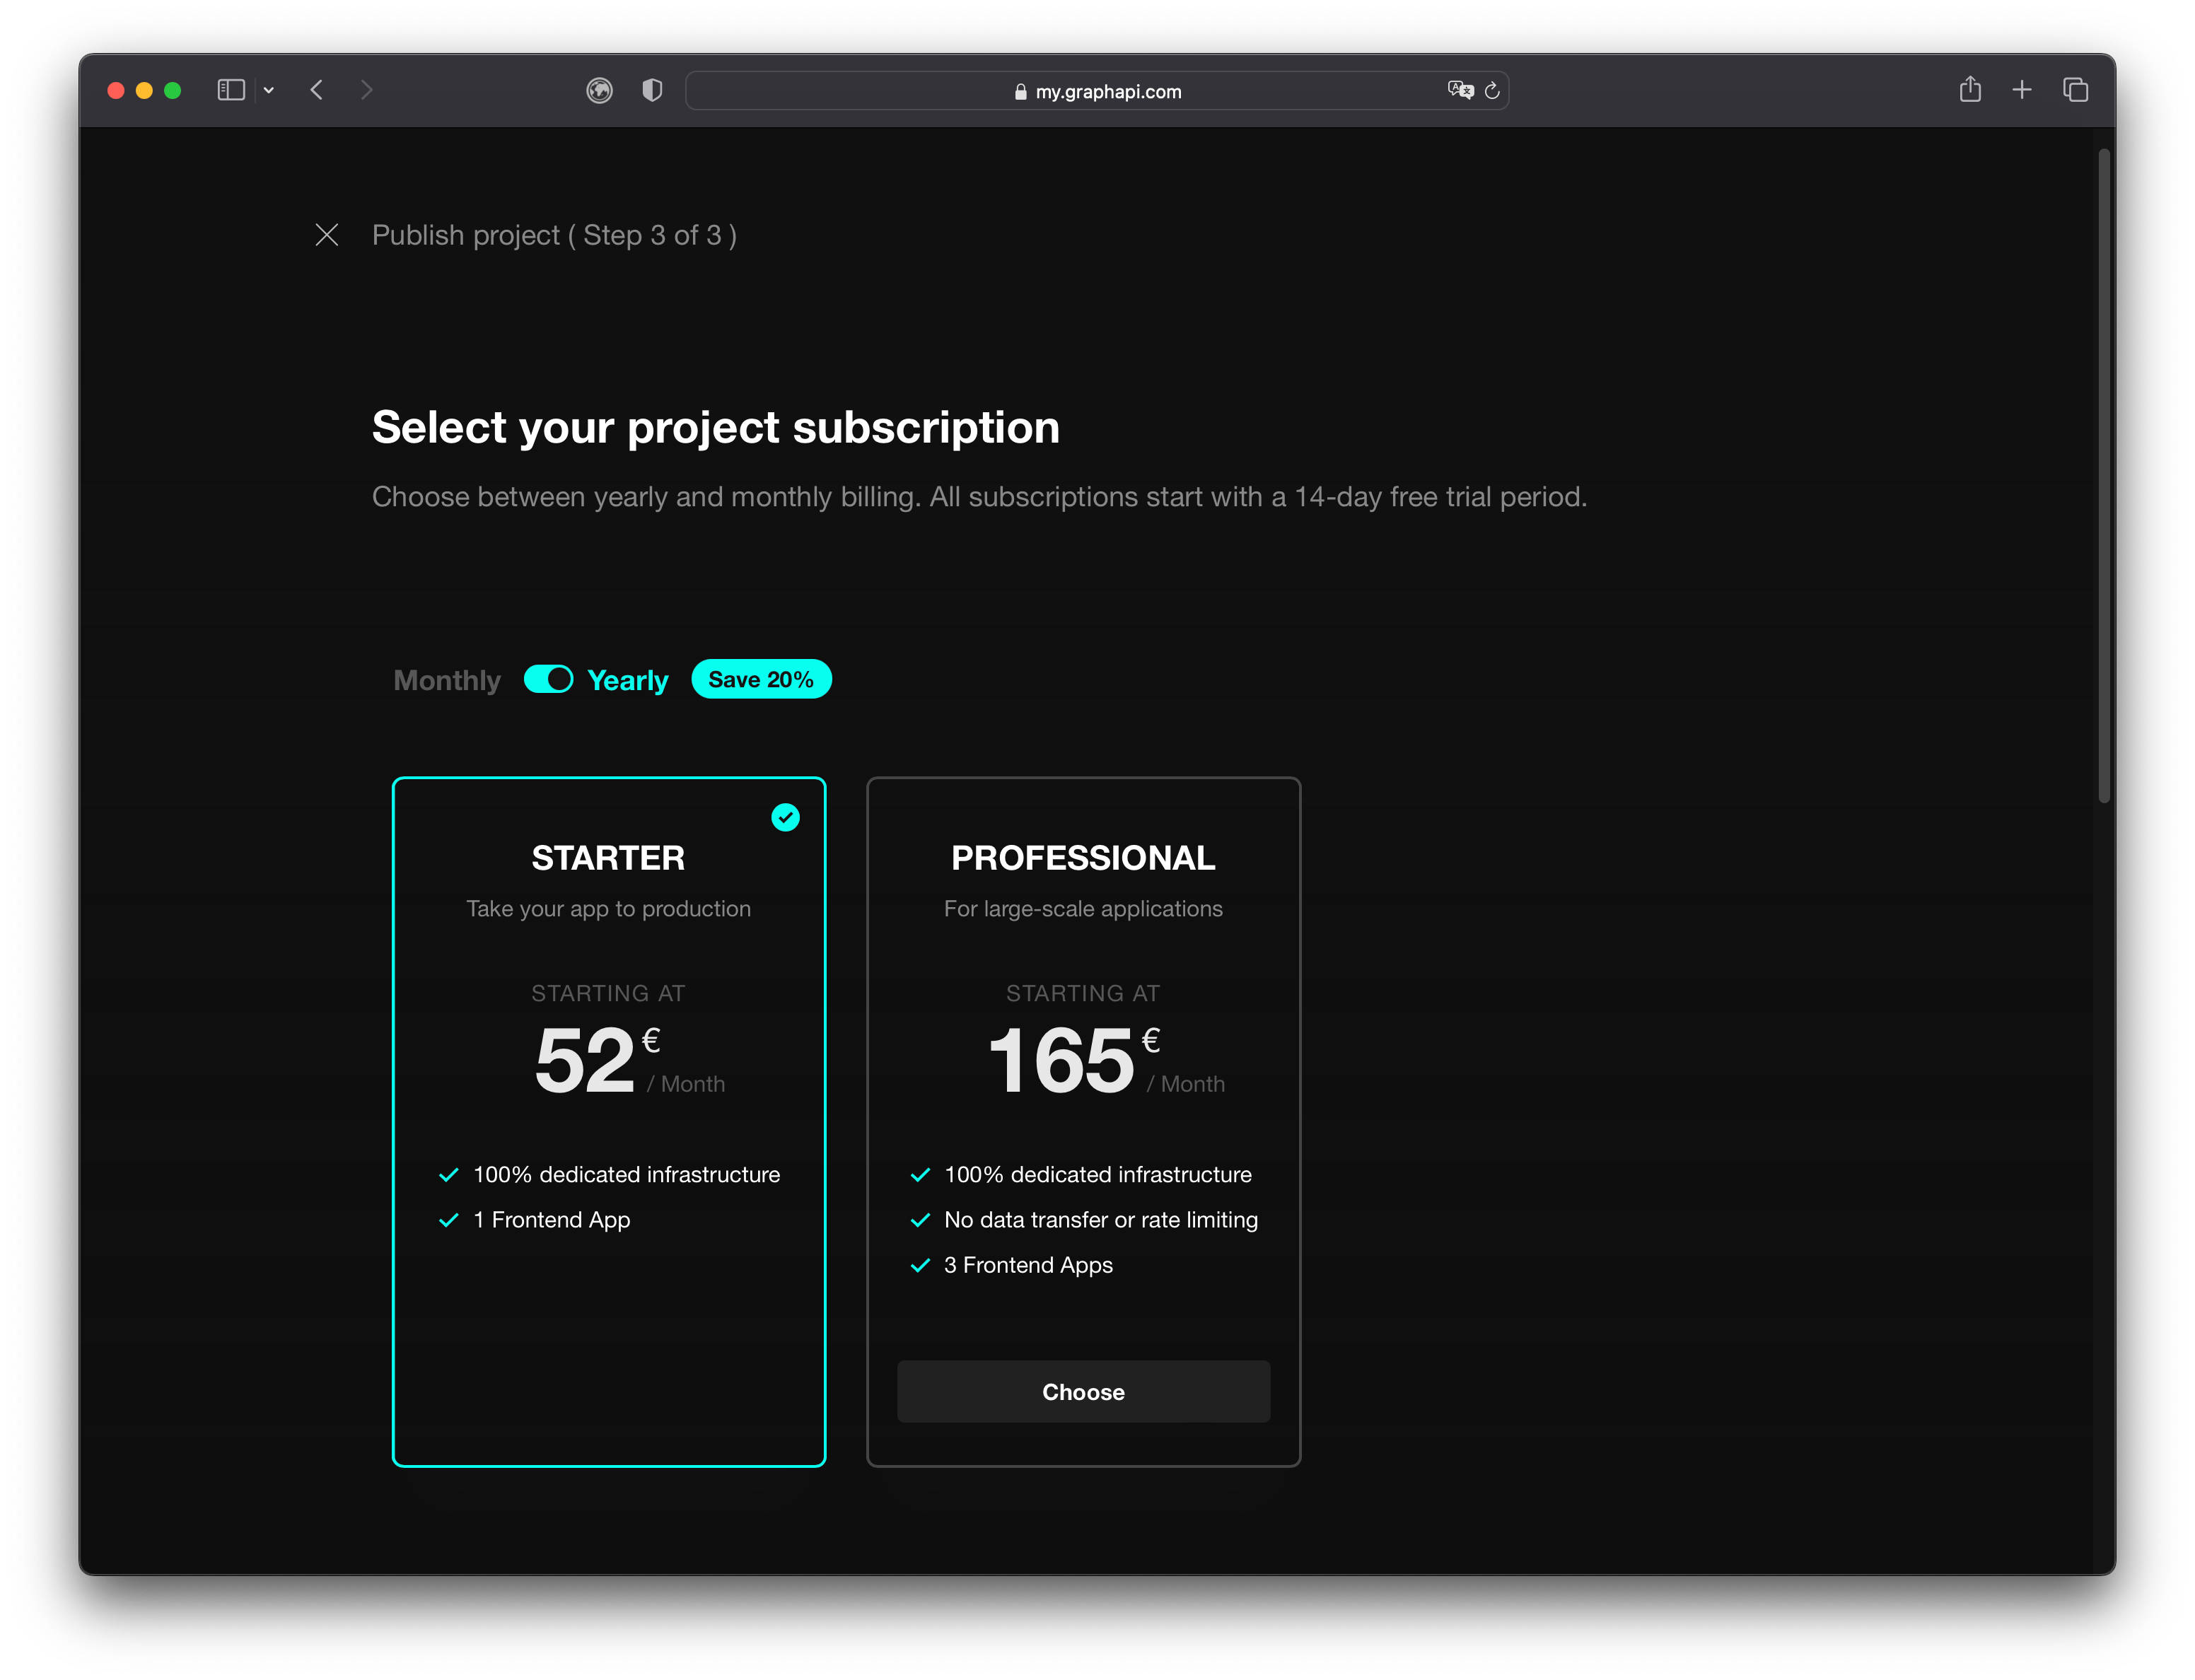
# Step 6 - Choose Subscription
We offer the following value packages:
- STARTER: Best for small-scale projects or MVPs
- PROFESSIONAL: Best for growing apps with a medium workload
- ENTERPRISE: Contact us if you need dedicated support, more scalability, and compliance
Each package has a fixed monthly fee with included capacity for GraphQL operations, Data Storage, and Data Transfer. If usage exceeds included capacity, overage charges will apply.
Subscriptions renew automatically and can be purchased monthly or yearly. We charge overage usage every month regardless of monthly or yearly billing.
TIP
Use yearly billing to save 20% on your monthly plan.
# Step 7 - Billing Details
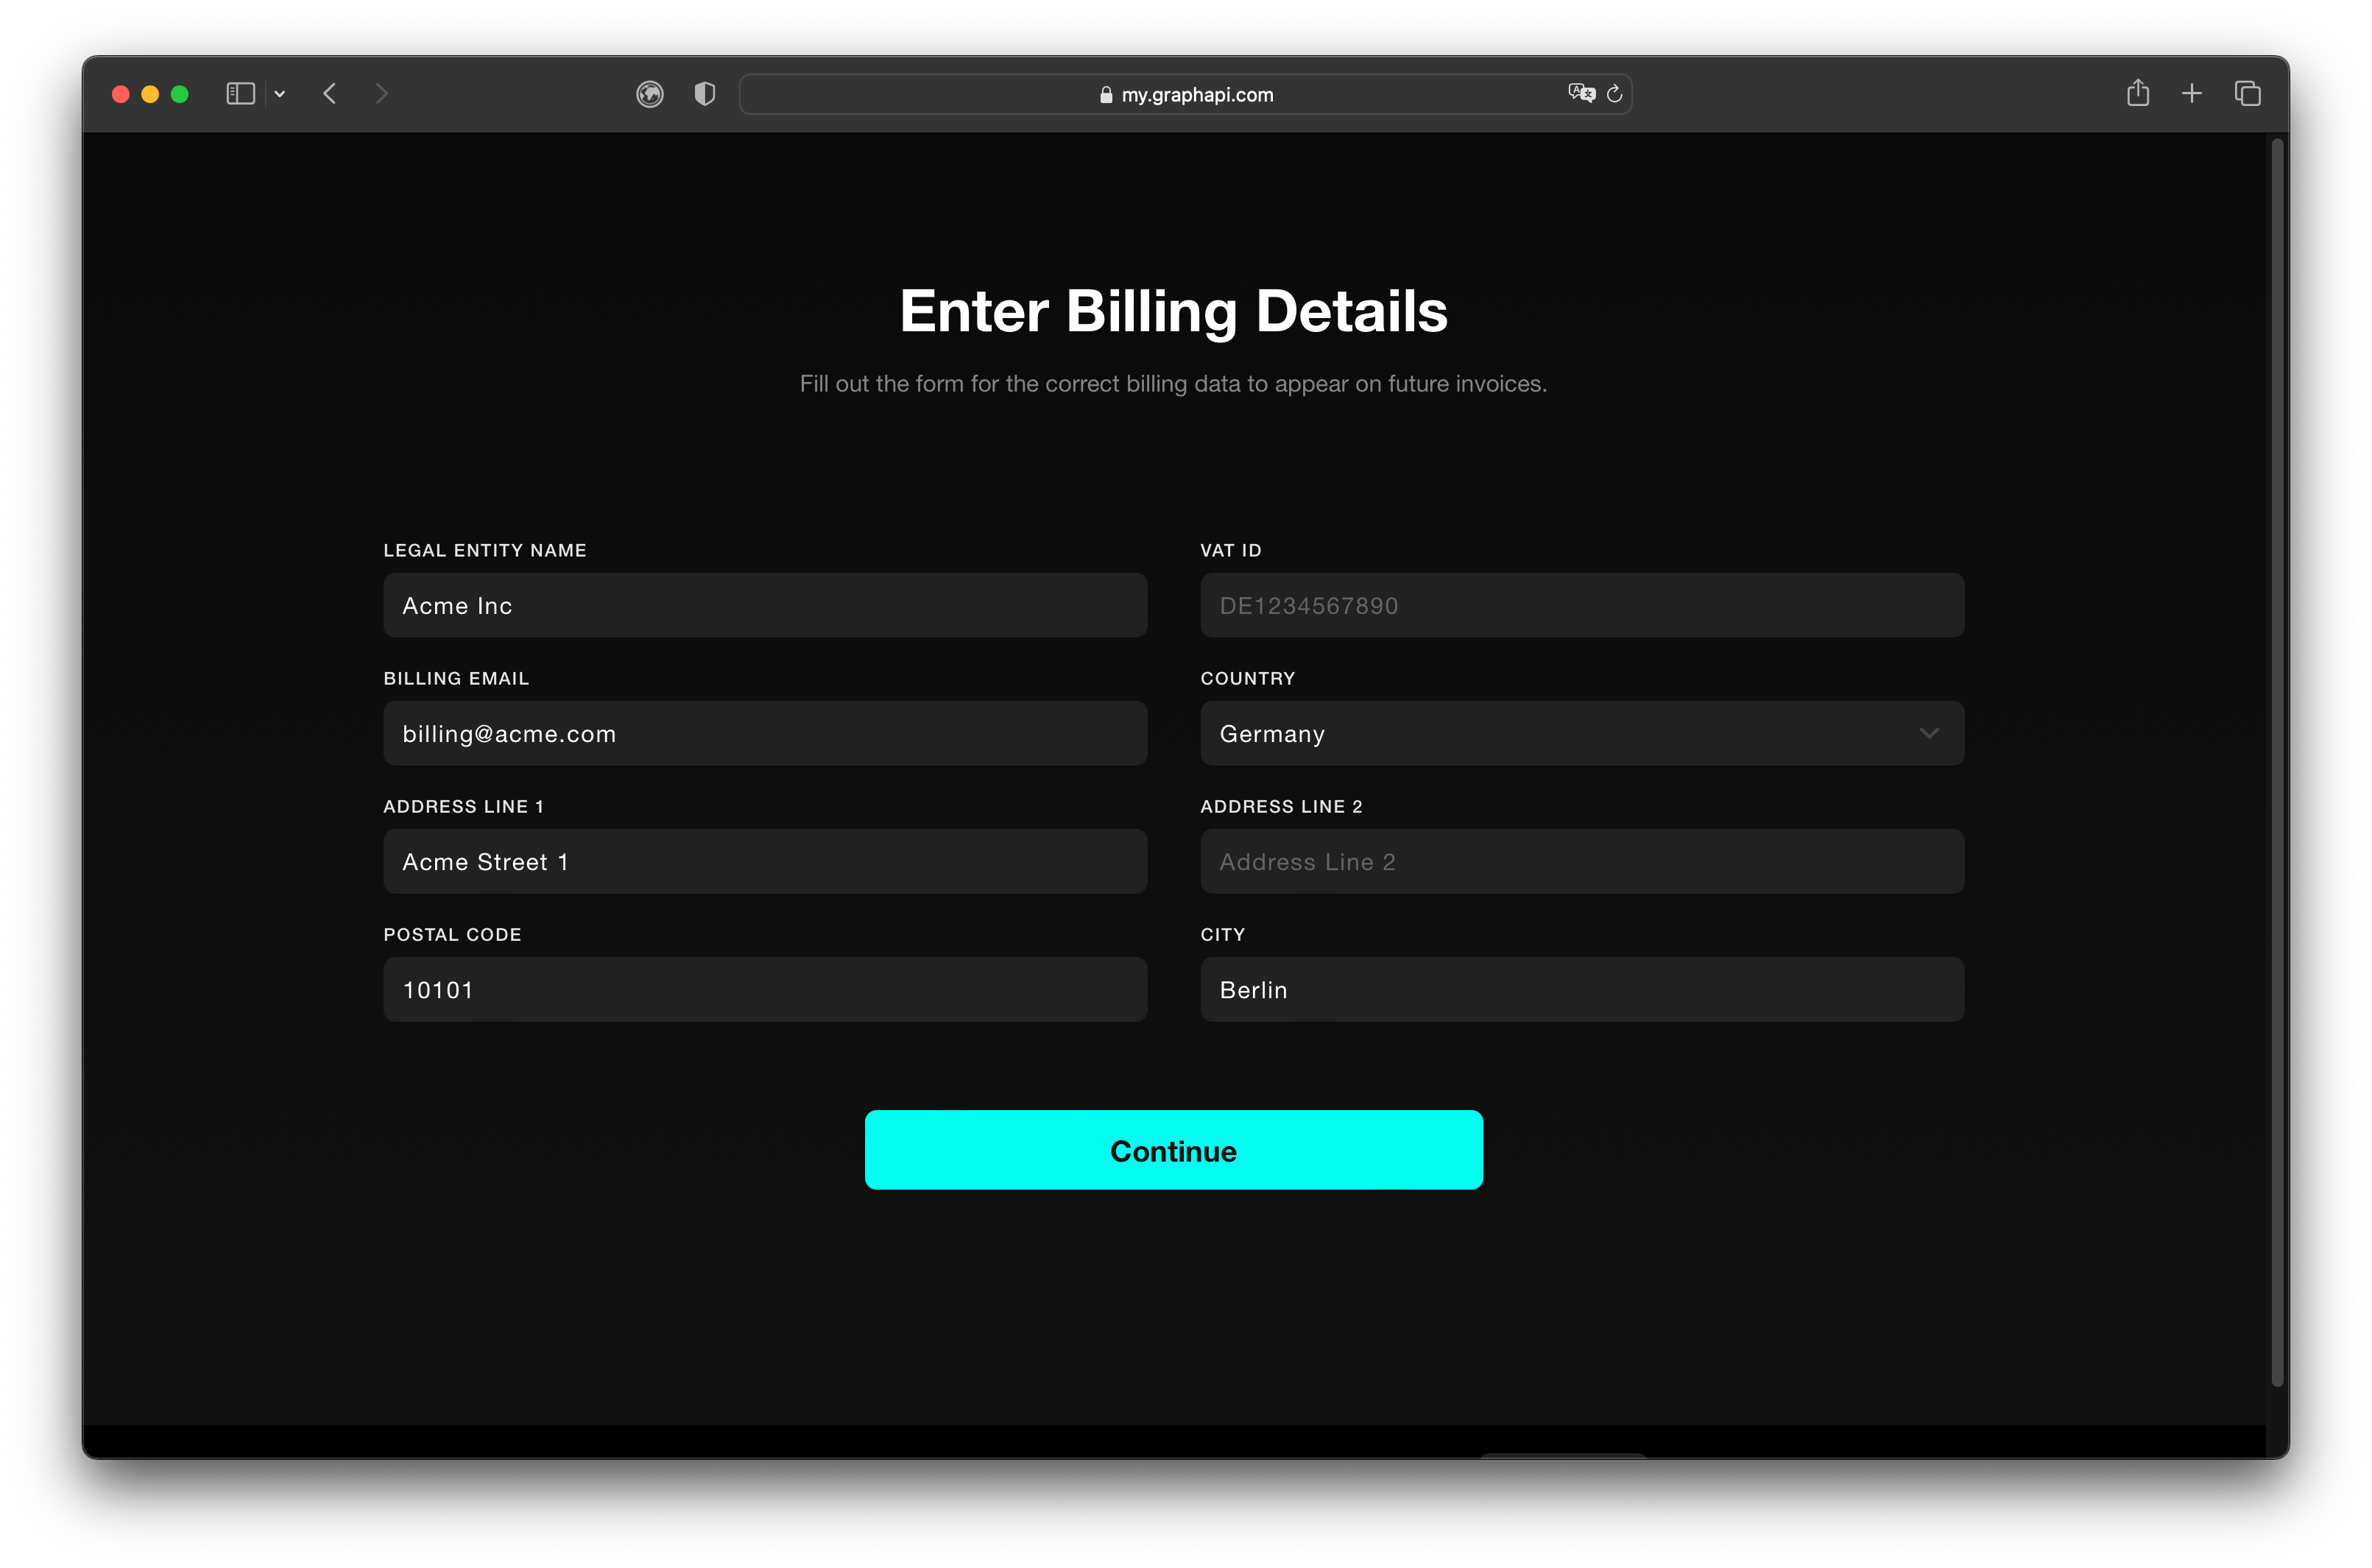
Enter billing details when this hasn't been done before. Non-german EU customers must enter their companies VAT-ID to proceed. Customers from outside the EU can leave the VAT-ID field empty.
TIP
Apply to our Early Stage Startup Program to get your first graphapi free for 3 months.
# Step 8 - Payment Data
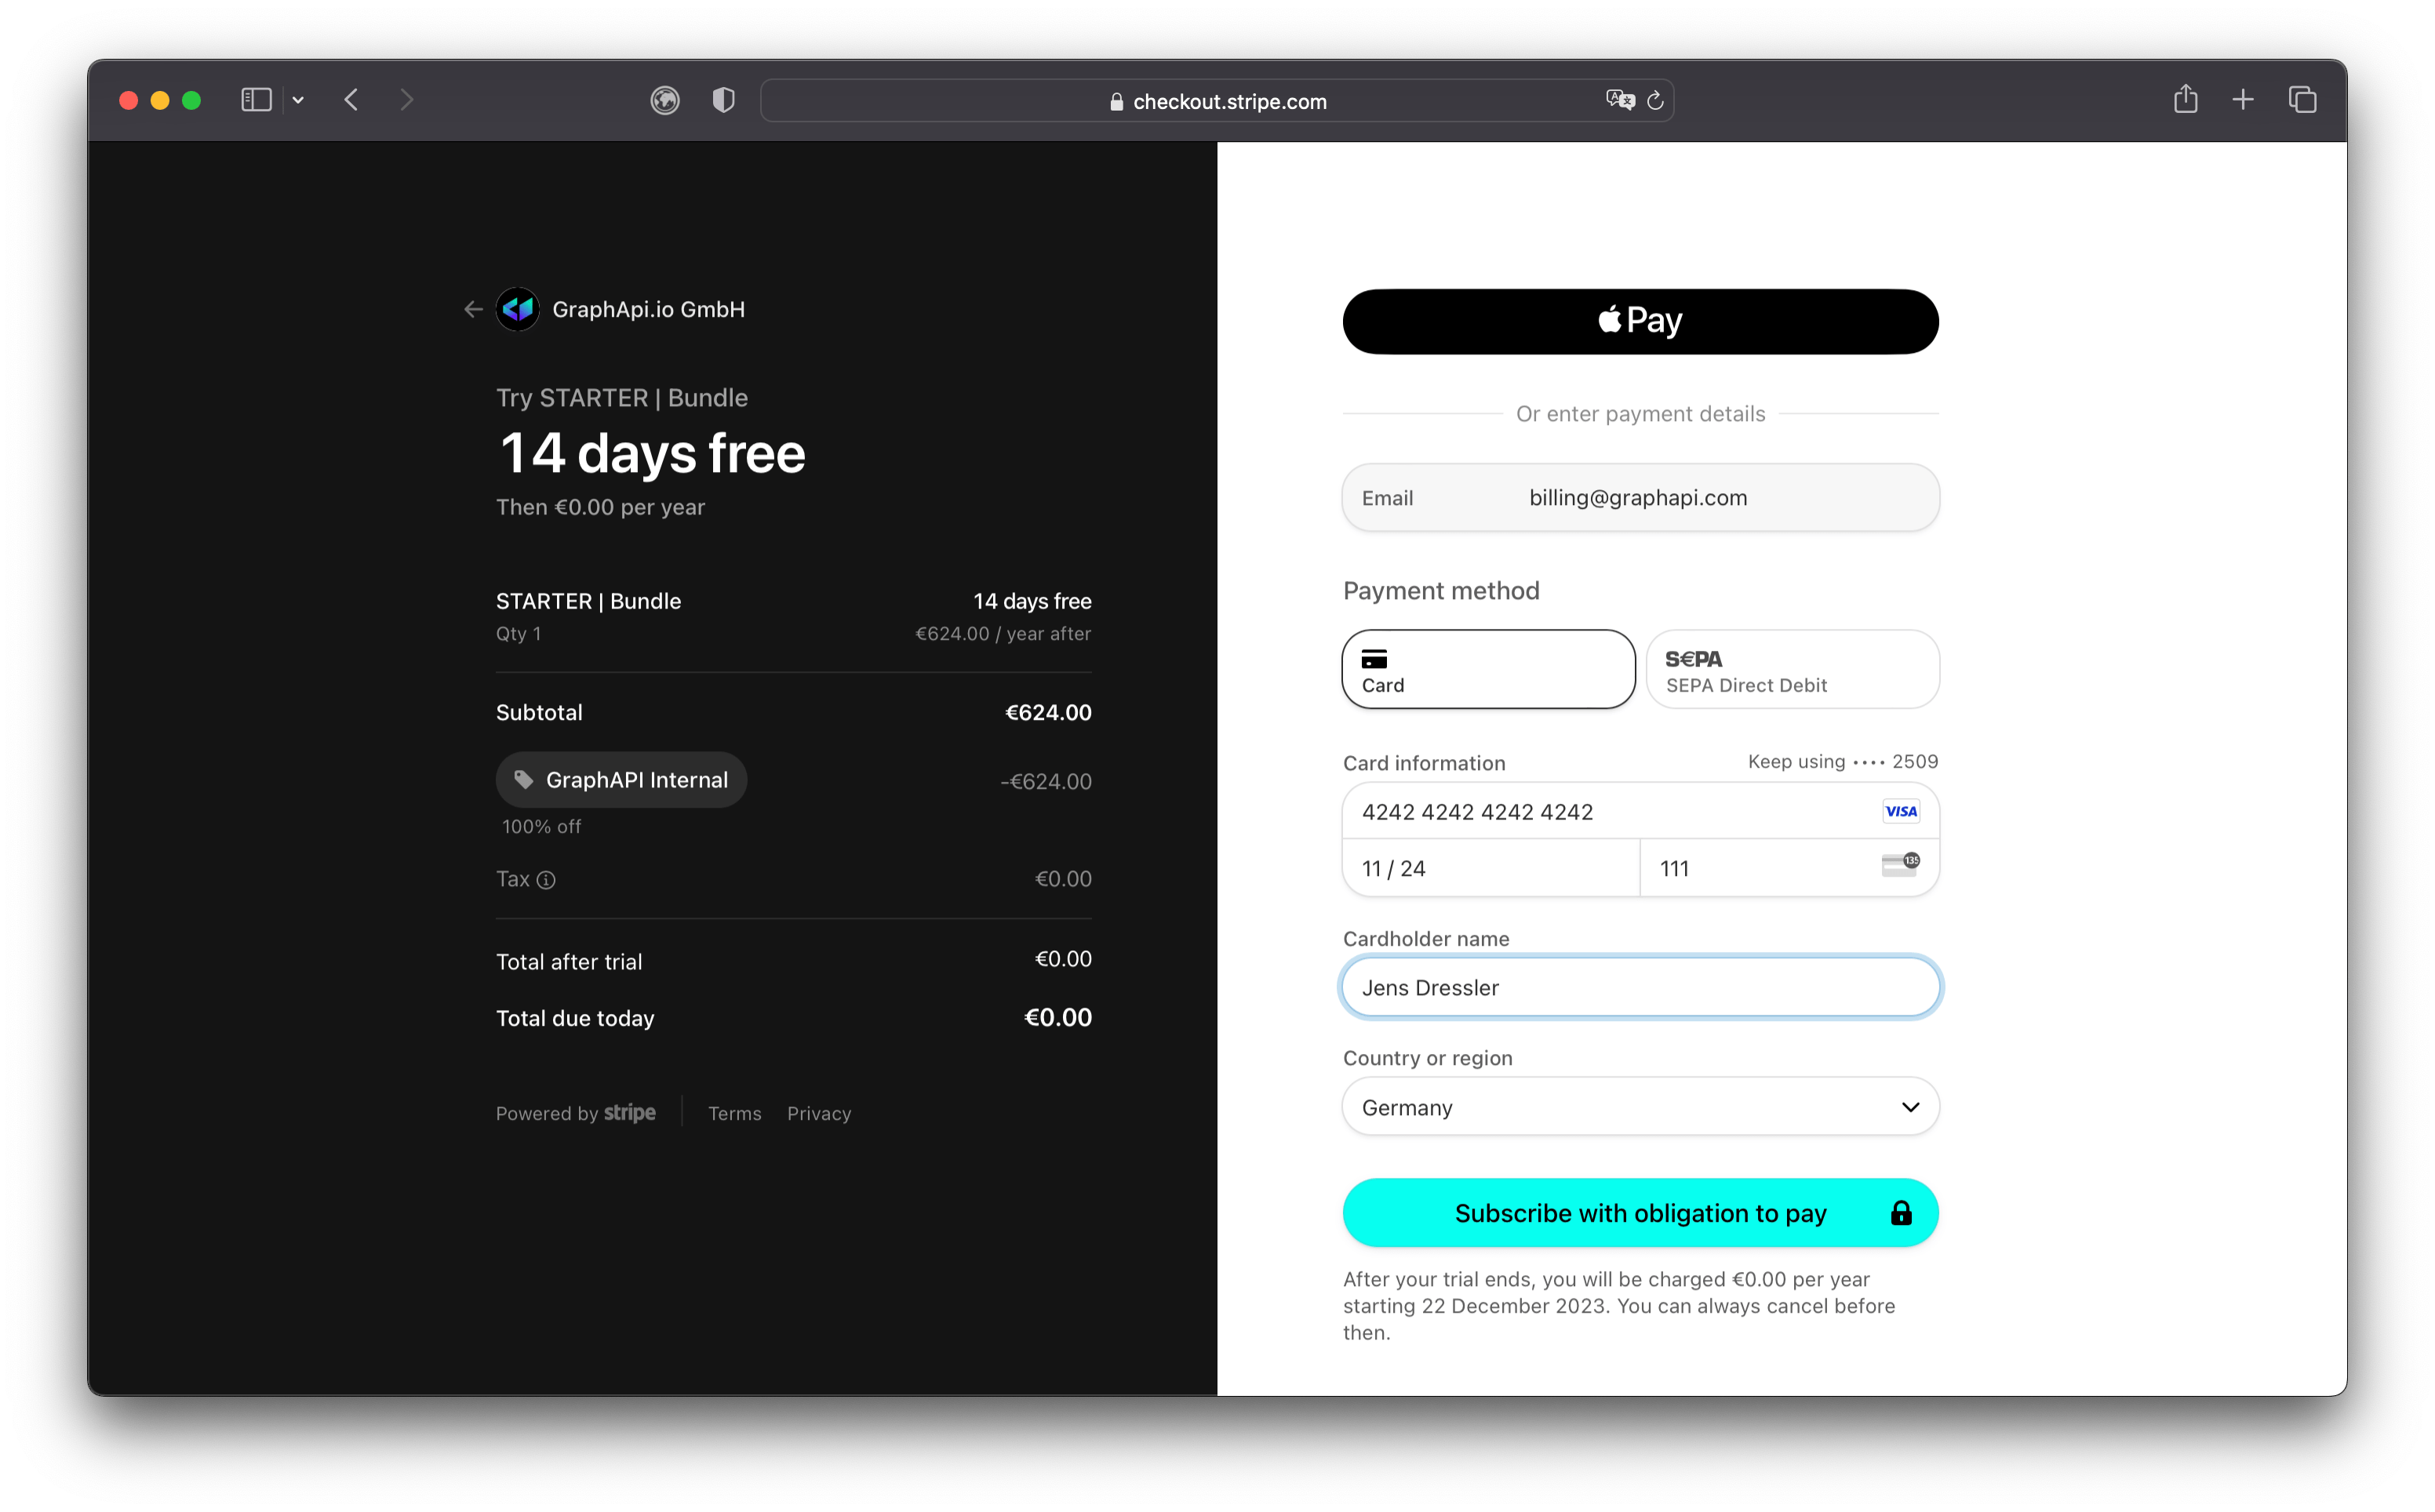
After entering the billing data and clicking Continue, the system redirects you to the checkout page of our payment provider Stripe. The Stripe checkout process is simple and secure, allowing customers to quickly and easily make payments for their subscription plans.
How it works:
- Verify the subscription summary Stripe presents.
- Enter your credit card information.
- Enter the name on your card.
- Verify that the country/region field is correct.
- Securly save your payment data for 1-click checkout (optional)
- Confirm the payment by clicking the Subscribe button
# Step 9 - Publishing
A successful checkout automatically triggers the publishing process. During publishing, the cloud infrastructure stack will be provisioned and deployed. After that, the GraphQL schema and all query and mutation resolvers are generated and published. When completed successfully, head to the graphapi settings page to find the GraphQL URL. Publishing usually takes between 5 and 10 minutes.
Further reading: Integrate GraphQL API
